Database with MongoDB
Add a MongoDB integration to your backend service
Create a MongoDB instance
Install your self managed MongoDB instance using Helm Charts.
-
Login to your OpenShift cluster on a terminal and choose your development project.
-
Create a
mongodb.values.yamlwith the following contentmongodb.values.yamlYou can change the username, password and database name to your liking.podSecurityContext: enabled: false containerSecurityContext: enabled: false auth: usernames: - myuser passwords: - mypassword databases: - inventory-db -
Run the following commands, it will install a Helm chart on your project, make sure to have
helminstalled locally.
$ helm repo add bitnami https://charts.bitnami.com/bitnami $ helm install mongodb bitnami/mongodb -f mongodb.values.yaml - Head over to your OpenShift console on the Topology perspective, you should the database created on your project.
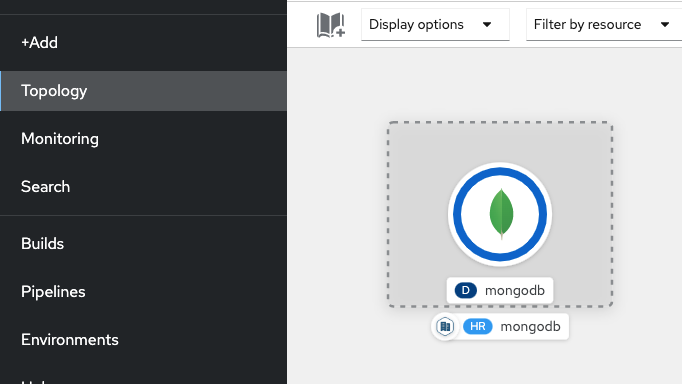
- The Helm chart creates a secret holding MongoDB passwords, for consistency of this tutorial we will be creating another secret holding the same information, formatted in another way.
Run the following command :You should see the created secret$ oc create secret generic --from-literal=MONGODB_HOST=mongodb --from-literal=MONGODB_PORT=27017 --from-literal=MONGODB_USER=myuser --from-literal=MONGODB_PASSWORD=mypassword --from-literal=MONGODB_DATABASE=inventory-db mongodb-accessmongodb-accesson your OpenShift console :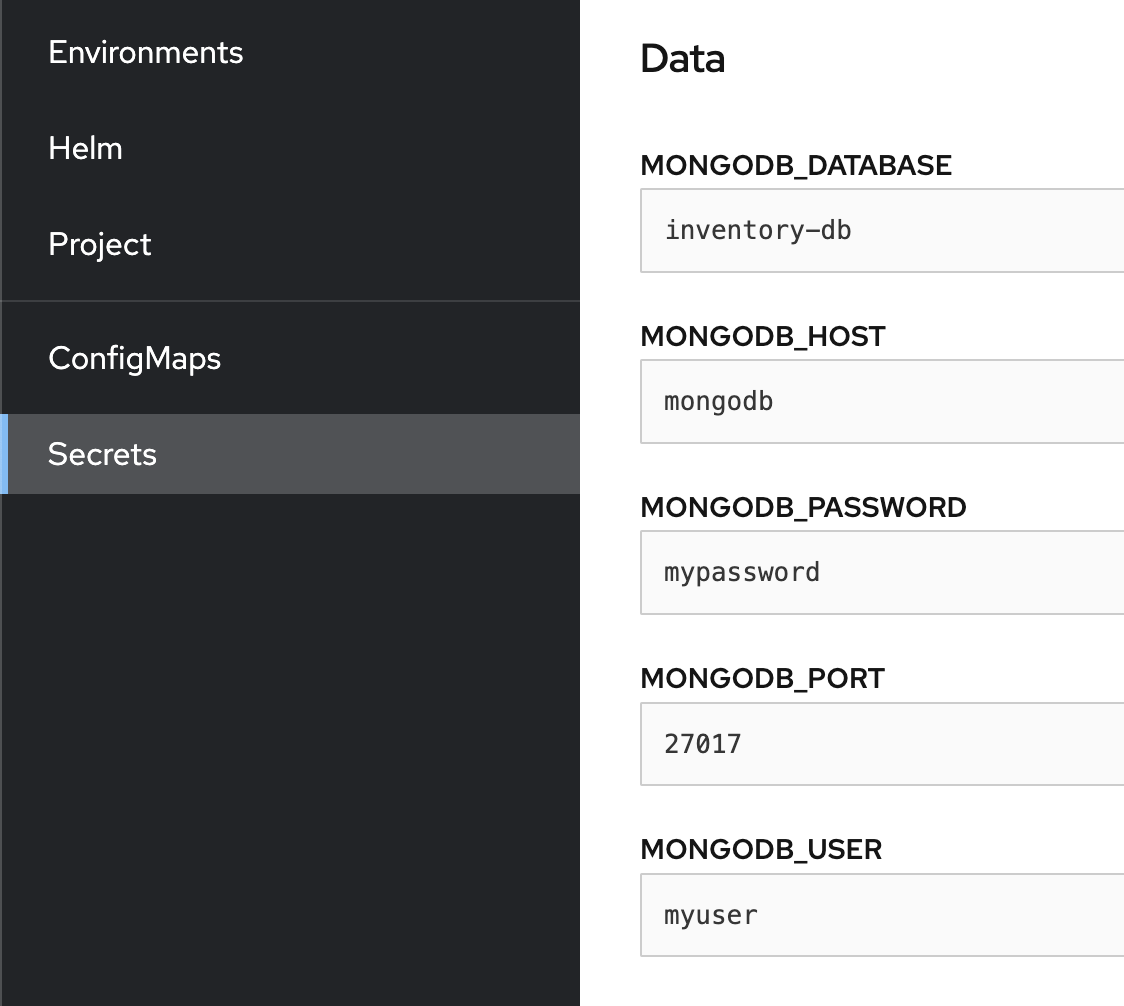
Warning
The IBM Cloud service enforces SSL certificates usage to access the instance, however this is not covered in this tutorial, you can find the documentation for it here.
Provision a MongoDB instance using the Databases for MongoDB service on IBM Cloud.
-
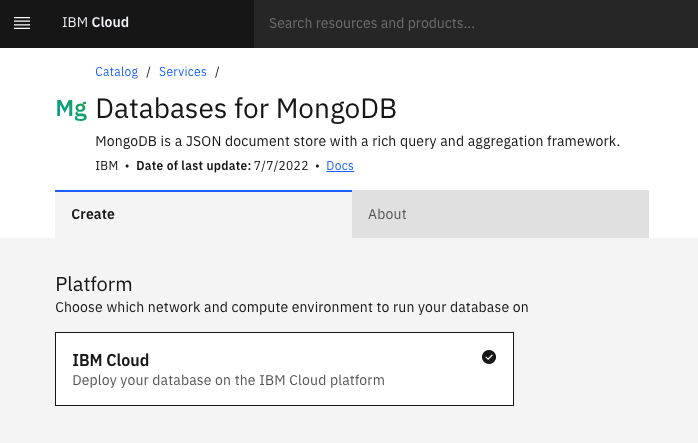
Log into the IBM Cloud console and look for the Databases for MongoDB service.
-
Configure it to your needs and create the instance.
-
After your instance has provisioned, create a Service Credential to have access to your MongoDB instance.
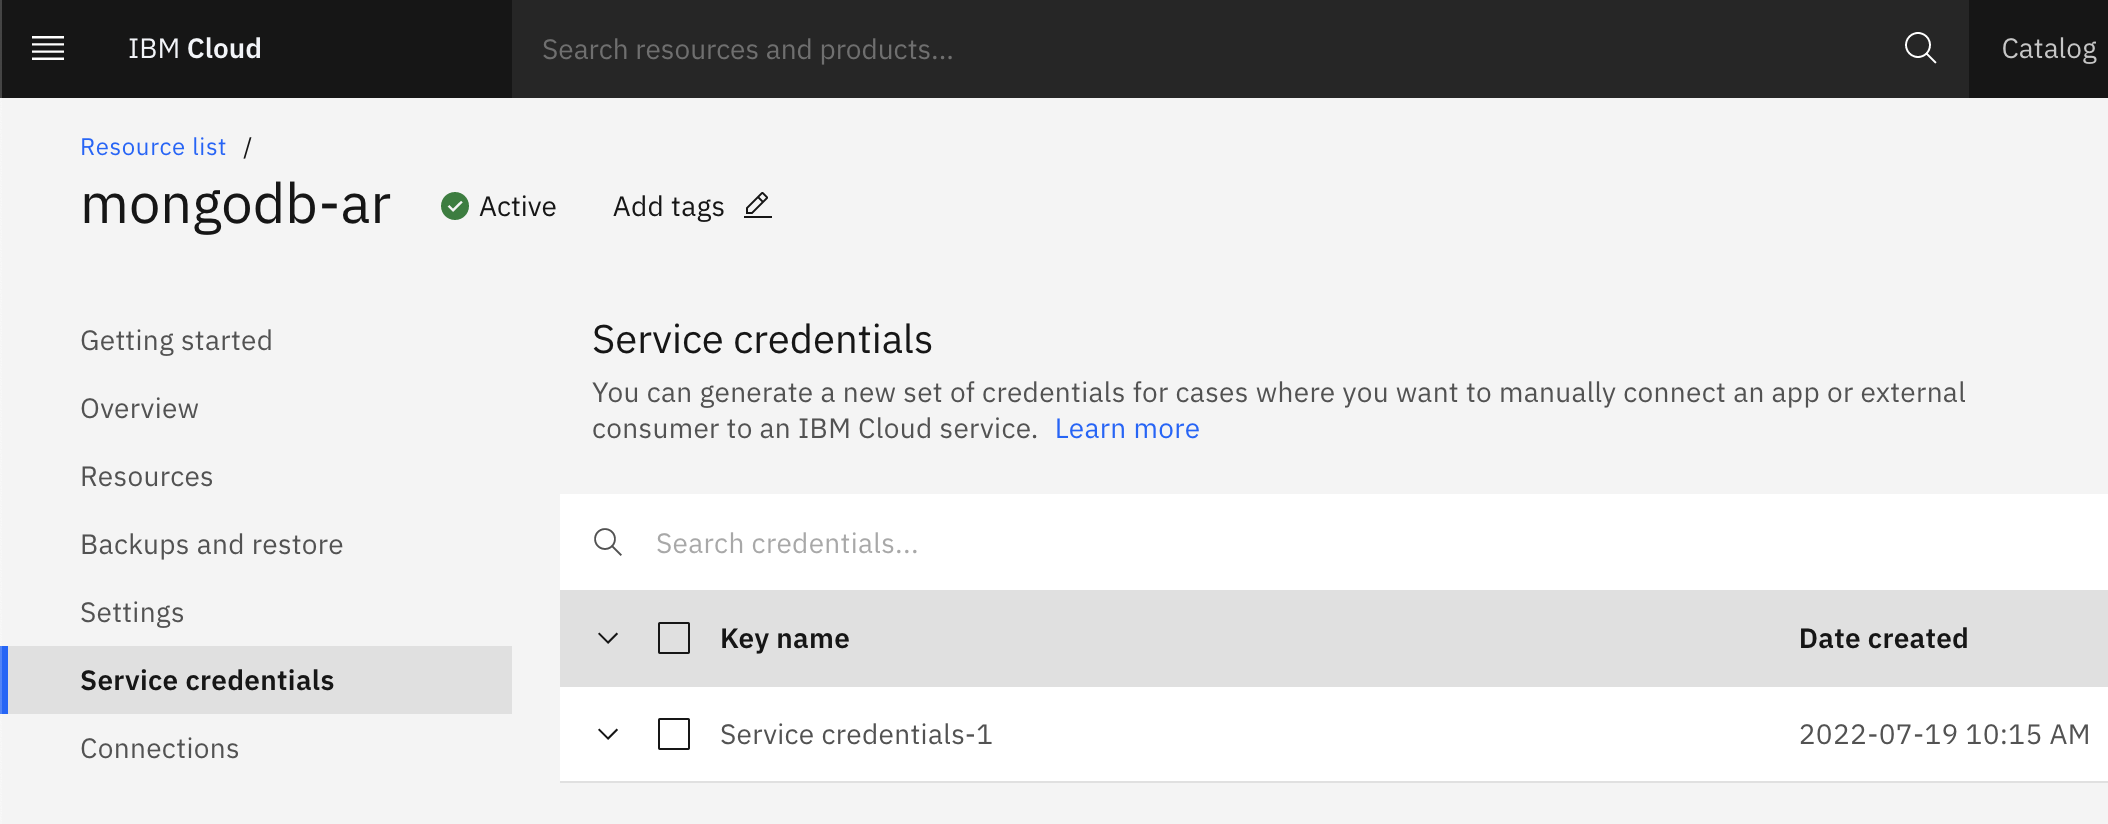 The service credential should contain information to login to the instance. We will look for the database, the hostname, the username, the password and a base64 encoded certificate.
Decode the certificate, and create an OpenShift secret holding these values :You can also do this from the OpenShift console :oc create secret generic --from-literal=MONGODB_HOST=<HOST> --from-literal=MONGODB_PORT=<PORT> --from-literal=MONGODB_USER=<USER> --from-literal=MONGODB_DATABASE=<DATABASE> --from-literal=MONGODB_PASSWORD=<PASSWORD> --from-literal=MONGODB_CERT=<DECODED_CERT> mongodb-access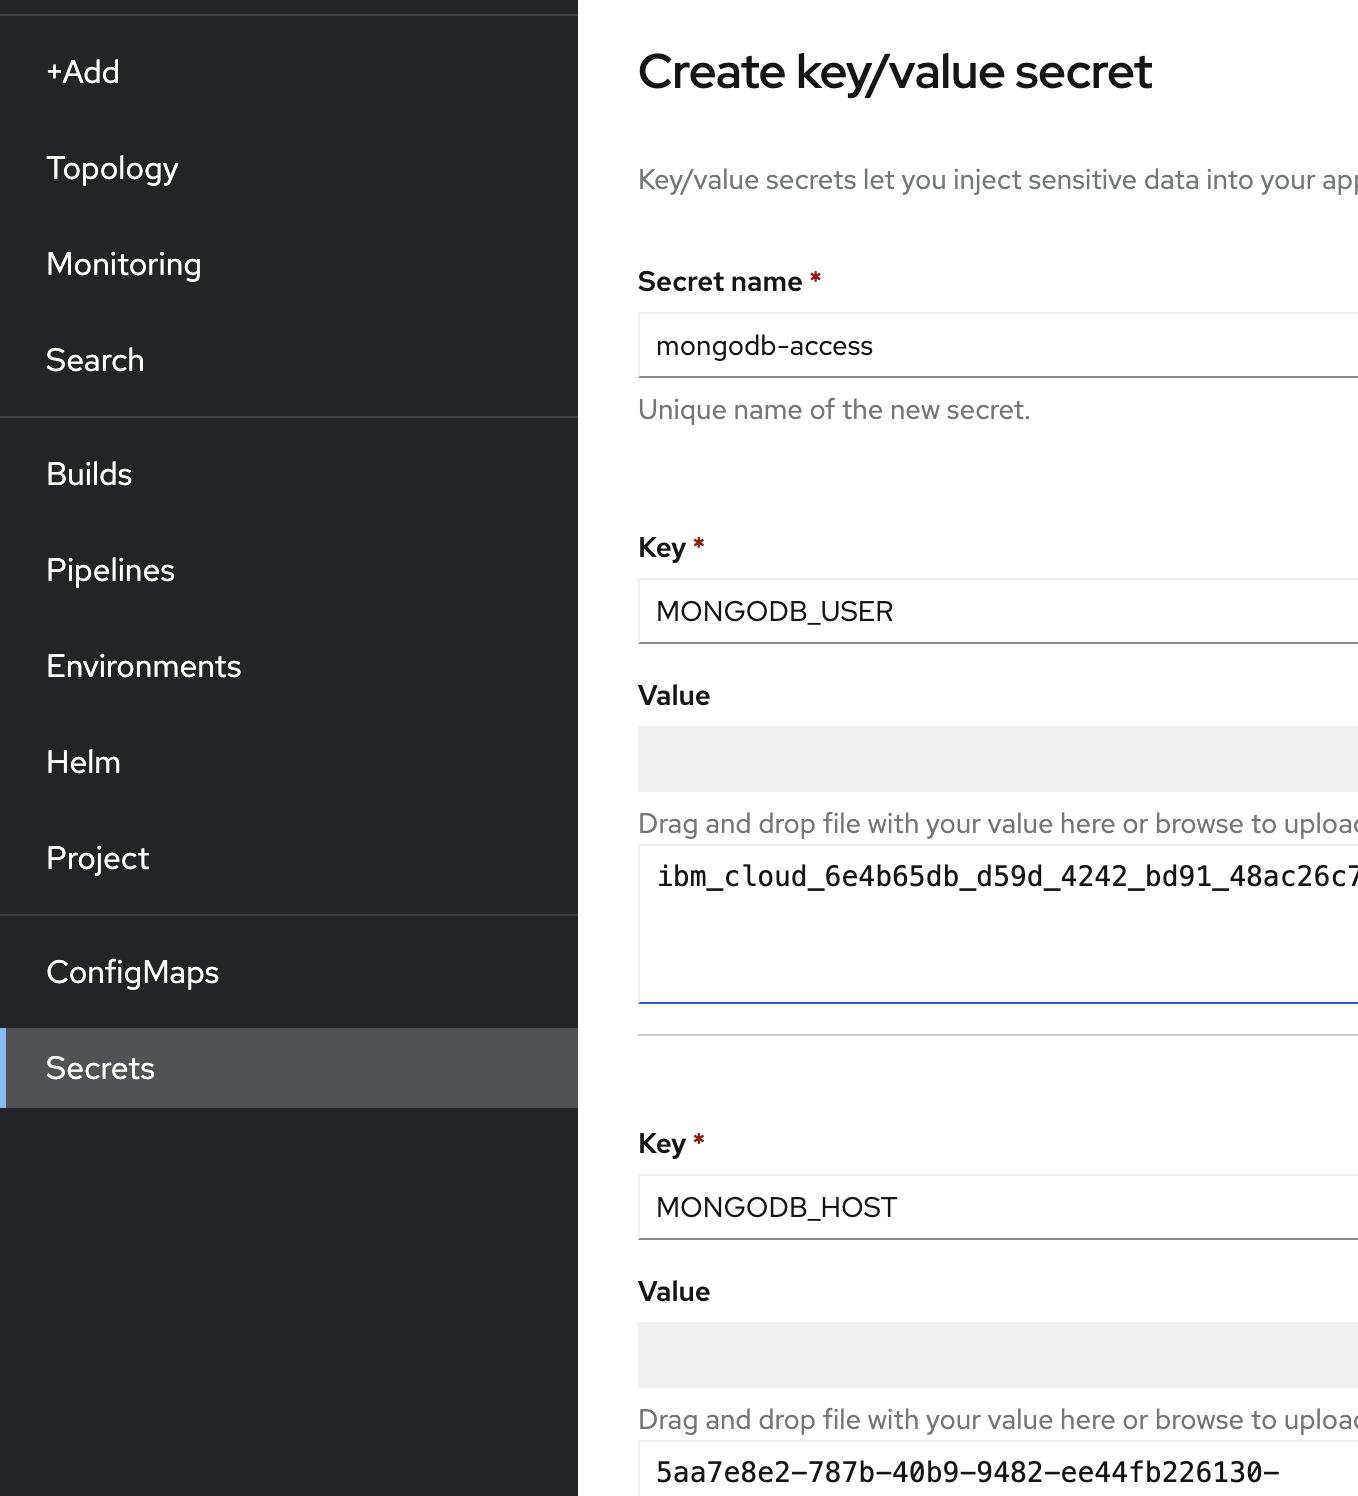
Create your own MongoDB instance on any other cloud platform and bring the login credentials.
Login to your OpenShift cluster and create a secret using the following command:
$ oc create secret generic --from-literal=MONGODB_HOST=<HOST> --from-literal=MONGODB_PORT=<PORT> --from-literal=MONGODB_USER=<USER> --from-literal=MONGODB_PASSWORD=<PASSWORD> --from-literal=MONGODB_DATABASE=<DATABASE> mongodb-access
<HOST>, <USER>, <PASSWORD> and <DATABASE> with your own MongoDB instance's credentials. Fill in the database with mock data
-
To help create test JSON data we are going to supply a template to the JSON Generator tool, this helps when creating dummy data for testing. Navigate to the following link https://www.json-generator.com/.
-
Replace the default template with following template. This will enable a 100 records of test data to be created to represent a products database. Click on the Generate button.
[ '{{repeat(100)}}', { _id: '{{objectId()}}', manufacturer: '{{company().toUpperCase()}}', name: '{{lorem(3, "words")}}', price: '{{floating(10, 1000, 2, "0.00")}}', stock: '{{integer(1, 100)}}' } ] - Connect to your MongoDB instance, create a new collection called
stockItemin your database and insert the generated data.
Enable database in the solution
If you are starting from the solution, use the following steps to enable the Cloudant database
Update the gradle config to include mongodb dependencies
- Head over to the
gradleand create the followingbuild-mongodb.gradlefile:gradle/build-mongodb.gradledependencies { implementation group: 'org.springframework.boot', name: 'spring-boot-starter-data-mongodb', version: '2.7.1' implementation group: 'org.springframework.boot', name: 'spring-boot-starter-data-jpa', version: '2.7.1' } - On the
build.gradlefile, add the following line :build.gradleapply from: 'gradle/build-mongodb.gradle' - Run
./gradlew build --refresh-dependenciesto validate the changes and load the libraries.
Update application configuration to connect to database
- On the
src/main/resources/application.ymlfile, update thespringby adding the content as such.src/main/resources/application.ymlReplace the placeholders with your database instance values.spring: data: mongodb: username: "${MONGODB_USERNAME:<USERNAME>}" password: "${MONGODB_PASSWORD:<PASSWORD>}" database: "${MONGODB_DATABASE:<DATABASE>}" authentication-database: "${MONGODB_DATABASE:<DATABASE>}" port: "${MONGODB_PORT:<PORT>}" host: "${MONGODB_HOST:<HOST>}" autoconfigure: exclude: org.springframework.boot.autoconfigure.jdbc.DataSourceAutoConfiguration
Update the configuration values in the Helm chart
- Open the
values.yamlfile and add the following value :
mongodbAccess=mongodb-access
deployment.yaml file and add the following environment variables : env:
- name: MONGODB_USERNAME
valueFrom:
secretKeyRef:
name: {{ .Values.mongodbAccess | quote }}
key: MONGODB_USERNAME
- name: MONGODB_PASSWORD
valueFrom:
secretKeyRef:
name: {{ .Values.mongodbAccess | quote }}
key: MONGODB_PASSWORD
- name: MONGODB_DATABASE
valueFrom:
secretKeyRef:
name: {{ .Values.mongodbAccess | quote }}
key: MONGODB_DATABASE
- name: MONGODB_PORT
valueFrom:
secretKeyRef:
name: {{ .Values.mongodbAccess | quote }}
key: MONGODB_PORT
- name: MONGODB_HOST
valueFrom:
secretKeyRef:
name: {{ .Values.mongodbAccess | quote }}
key: MONGODB_HOST
Update project files
-
Update the
StockItem.javafile, add an@Idannotation on theidfield.src/main/java/com/ibm/inventory_management/models/StockItem.javapackage com.ibm.inventory_management.models; import org.springframework.data.annotation.Id; import java.io.Serializable; public class StockItem implements Serializable { private String name; @Id private String id = null; private int stock = 0; private double price = 0.0; private String manufacturer = ""; public StockItem() { super(); } public StockItem(String id) { this.id = id; } public String getName() { return name; } public void setName(String name) { this.name = name; } public StockItem withName(String name) { this.setName(name); return this; } public String getId() { return id; } public void setId(String id) { this.id = id; } public StockItem withId(String id) { this.setId(id); return this; } public int getStock() { return stock; } public void setStock(int stock) { this.stock = stock; } public StockItem withStock(int stock) { this.setStock(stock); return this; } public double getPrice() { return price; } public void setPrice(double price) { this.price = price; } public StockItem withPrice(double price) { this.setPrice(price); return this; } public String getManufacturer() { return manufacturer; } public void setManufacturer(String manufacturer) { this.manufacturer = manufacturer; } public StockItem withManufacturer(String manufacturer) { this.setManufacturer(manufacturer); return this; } } -
Create a
StockItemRepository.javainterface to interact with the database, put it in arepositoriesdirectory.src/main/java/com/ibm/inventory_management/repositories/StockItemRepository.javapackage com.ibm.inventory_management.repositories; import com.ibm.inventory_management.models.StockItem; import org.springframework.data.mongodb.repository.MongoRepository; import org.springframework.stereotype.Repository; import java.util.Optional; @Repository public interface StockItemRepository extends MongoRepository<StockItem, String> { Optional<StockItem> findById(String id); } -
Update the
StockItemApi.javainterface to have CRUD operations.src/main/java/com/ibm/inventory_management/services/StockItemApi.javapackage com.ibm.inventory_management.services; import java.util.List; import com.ibm.inventory_management.models.StockItem; public interface StockItemApi { List<StockItem> listStockItems() throws Exception; void addStockItem(String name, Double price, Integer stock, String manufacturer) throws Exception; void updateStockItem(String id, String name, Double price, Integer stock, String manufacturer) throws Exception; void deleteStockItem(String id) throws Exception; } -
Update the
StockItemService.javato implement the interface and use the repository.src/main/java/com/ibm/inventory_management/services/StockItemService.javapackage com.ibm.inventory_management.services; import java.util.List; import com.ibm.inventory_management.repositories.StockItemRepository; import org.bson.types.ObjectId; import org.springframework.beans.factory.annotation.Autowired; import org.springframework.stereotype.Service; import com.ibm.inventory_management.models.StockItem; @Service public class StockItemService implements StockItemApi { @Autowired private StockItemRepository stockItemRepository; @Override public List<StockItem> listStockItems() { return stockItemRepository.findAll(); } @Override public void addStockItem(String name, Double price, Integer stock, String manufacturer) throws Exception { try { stockItemRepository.save( new StockItem(ObjectId.get().toString()) .withName(name) .withManufacturer(manufacturer) .withStock(stock) .withPrice(price) ); } catch (Exception e) { throw new Exception("",e); } } @Override public void updateStockItem(String id, String name, Double price, Integer stock, String manufacturer) throws Exception { try { StockItem itemToUpdate = stockItemRepository.findById(id).get(); itemToUpdate.setName(name !=null ? name : itemToUpdate.getName()); itemToUpdate.setManufacturer(manufacturer != null ? manufacturer : itemToUpdate.getManufacturer()); itemToUpdate.setPrice(price != null ? price : itemToUpdate.getPrice()); itemToUpdate.setStock(stock != null ? stock : itemToUpdate.getStock()); stockItemRepository.save(itemToUpdate); } catch (Exception e) { throw new Exception("",e); } } @Override public void deleteStockItem(String id) throws Exception { try { stockItemRepository.deleteById(id); } catch (Exception e){ throw new Exception("",e); } } }
Running the application locally
- Start the application locally
./gradlew build
./gradlew bootrun
Tip
If you are using MongoDB on OpenShift, you can use the oc port-forward command to access your database instance through localhost
-
Open a browser to
http://localhost:9080/swagger-ui.html -
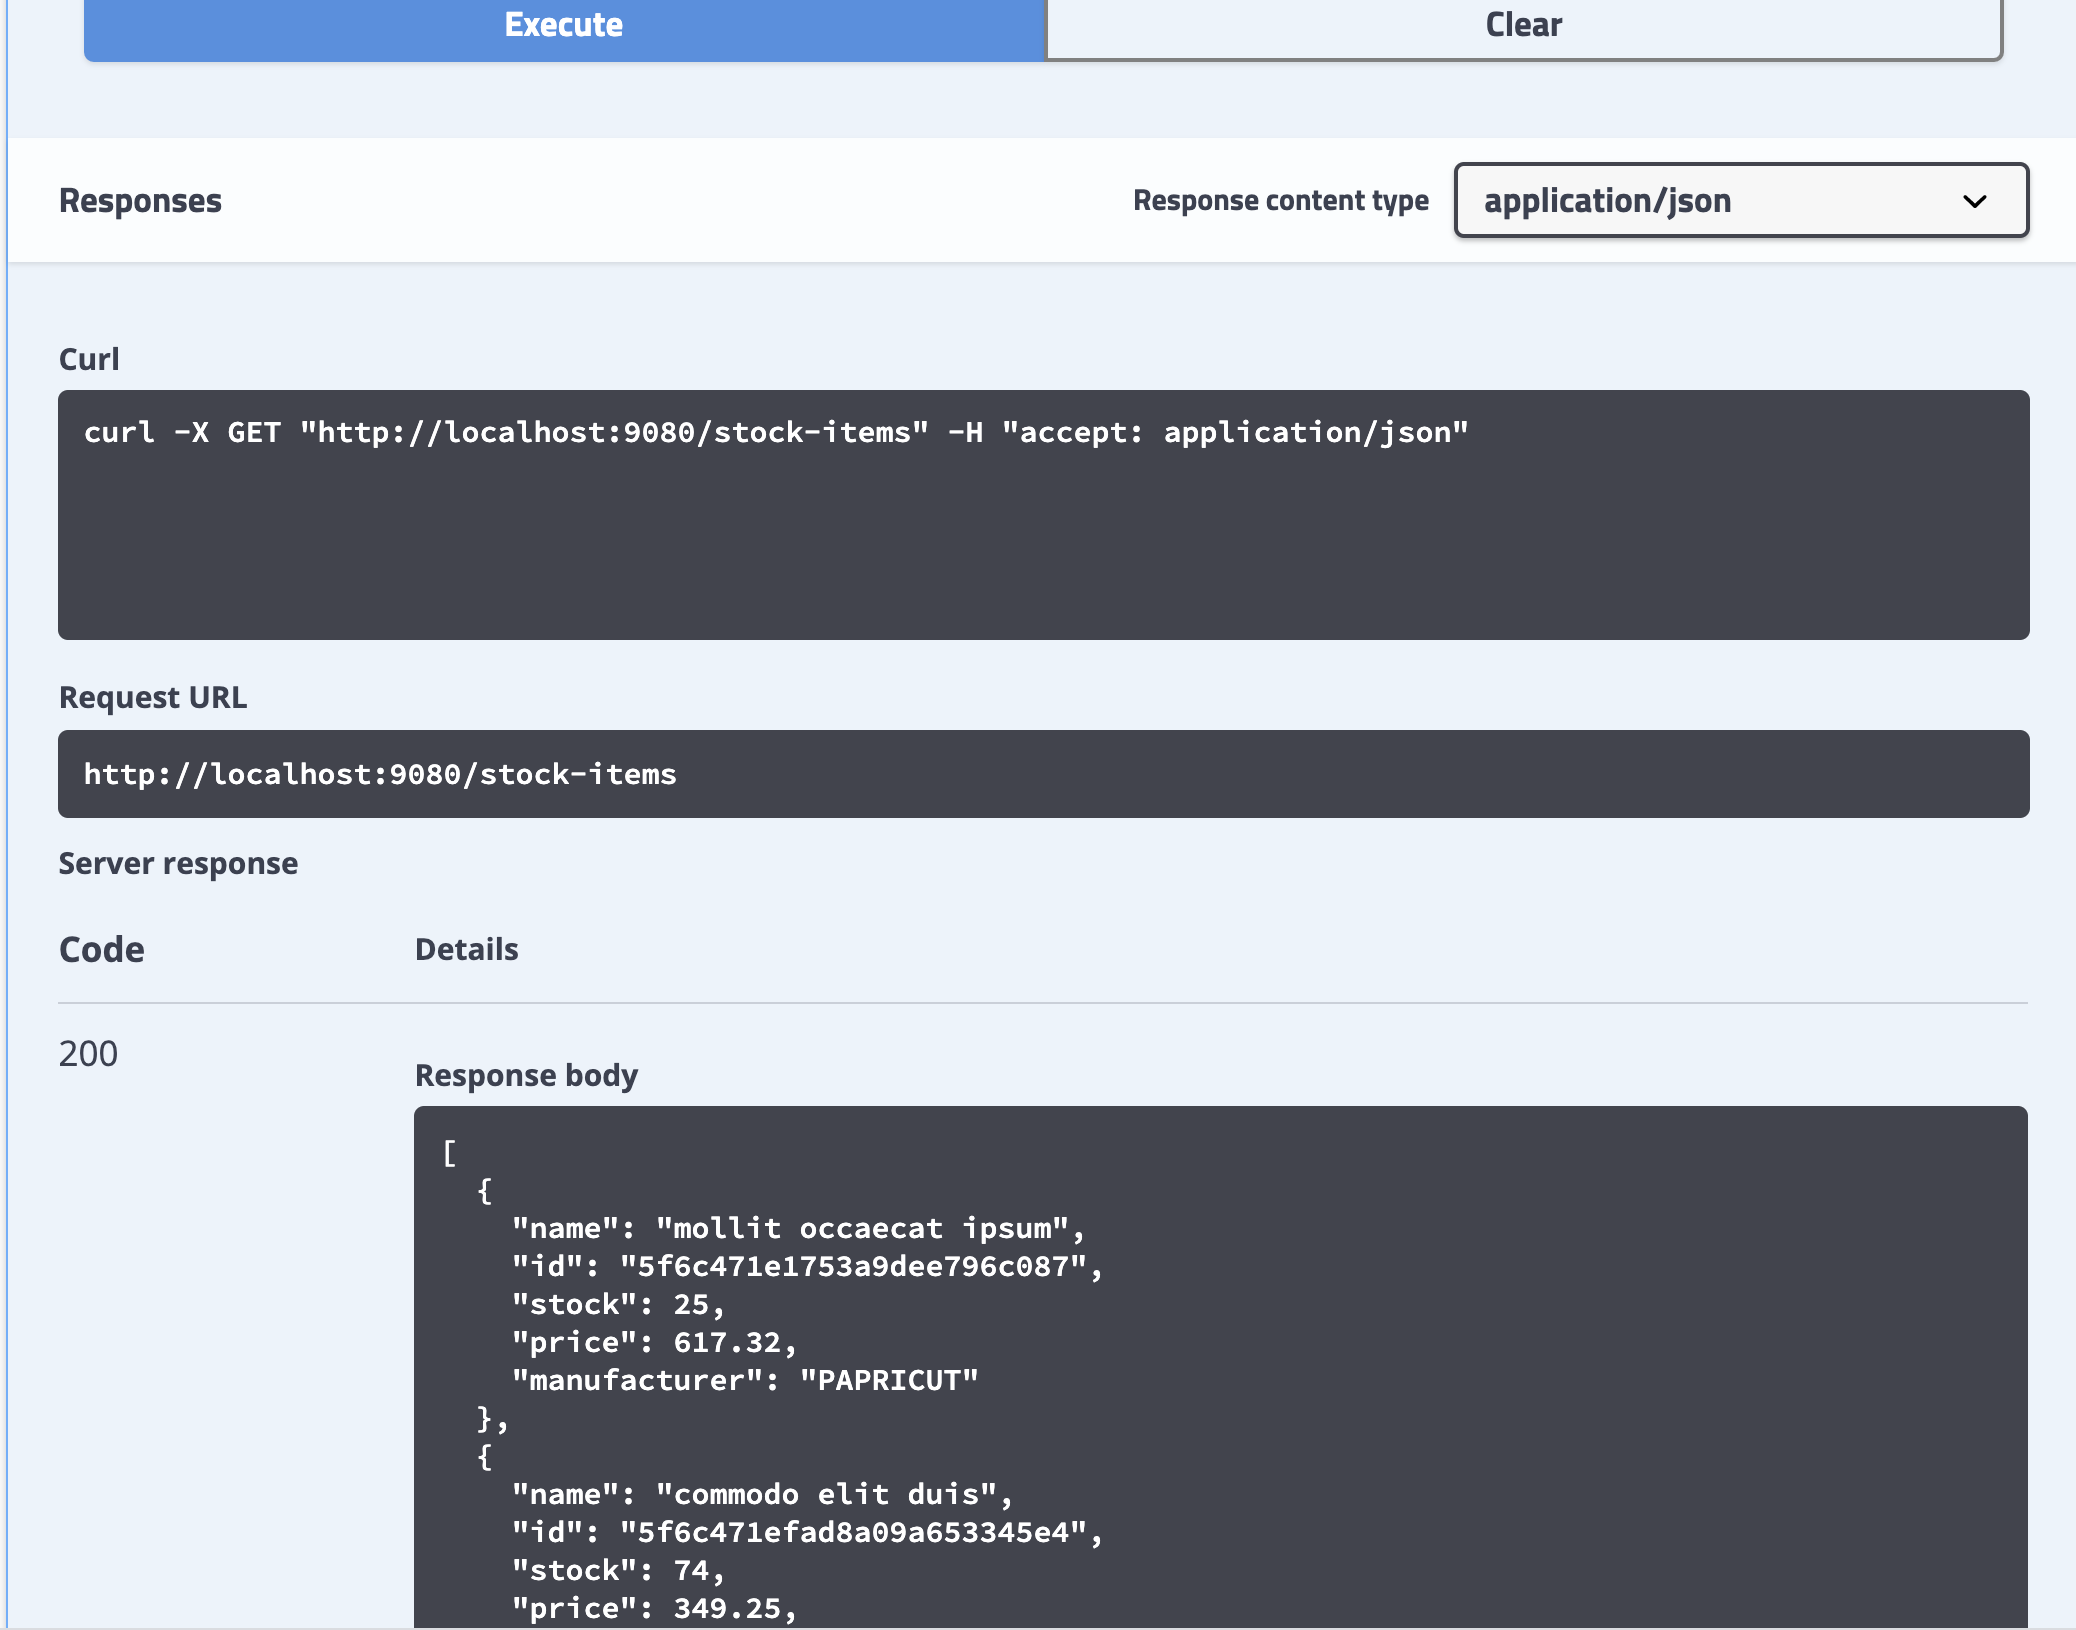
Once the application is up, go the Swagger UI and execute get
stock-items. -
You should be able to see all the data you pushed to the database through ./dataload.sh
Prebuilt solution for this can be found here: Inventory Management Service MongoDB solution template
Note
You will need to setup your own database credentials in the application.yml file.