Developer Tools Setup
To enable the best working experience through the hands-on exercises, you need to select the environment you plan to use for development and the required tools for integration with your OpenShift development environment.
- If you plan to use your desktop/laptop for hands-on exercises, follow the instructions in the Desktop/Laptop tab. You will need a recent macOS or Windows 10 operating system for this option.
- If you cannot install tools on your desktop/laptop, follow the Web Terminal instructions.
Once you have fulfilled these setup requirements you will be ready to start the Developer Intermediate agenda.
Open Web Terminal
To be able to run CLI commands to drive common operations on the cluster you will first need to open your web terminal instance. - Click on the >_ icon in the header of the OpenShift Console. You should see a terminal open at the bottom of the console screen. - Validate that you can run oc commands, run the following command
oc sync --version
Tools installation on Desktop/Laptop
The following tools are required:
-
Git Client: needs to be installed in your development operating system, it comes as standard for Mac OS.
-
IBM Cloud CLI: required for the management of your IBM Cloud Account, and managed IBM Kubernetes and Red Hat OpenShift clusters
- Aside from installing the IBM Cloud CLI, you will need to install the IBM Cloud CLI and Developer Tools too:
$ curl -sL https://ibm.biz/idt-installer | bash -
Note: if you log in to the web UI using SSO, you'll need to create an API key to log in to the CLI. You can also use this API key for installing the Developer Tools environment.
-
OpenShift OC CLI: required for Red Hat OpenShift management and development, select 4.3.18 or later version.
-
Place
ocandkubectlin your TerminalPATH: -
MacOS/Linux
- Once downloaded navigate to the
Downloadfolder:$ cd ~/Downloads/openshift-origin-client-tools-v3/ - Then copy
ocandkubectlto the system-wide available scripts folder (which is already in your PATH).$ cp kubectl /usr/local/bin/kubectl $ cp oc /usr/local/bin/oc - Docker Desktop: required for running common tools and Developer Tools Image.
-
Installed and running on your local machine.
-
Node: required for running the IBM Garage for Cloud CLI.
- Installed on your local machine.
-
Recommended:
v12.x LTS. -
IBM Garage for Cloud CLI: used to help make working with the development tools as easy as possible.
$ npm i -g @ibmgaragecloud/cloud-native-toolkit-cli -
Tekton CLI: used to help control Tekton pipelines from the command line.
$ brew tap tektoncd/tools $ brew install tektoncd/tools/tektoncd-cli -
Visual Studio Code: a popular code editor
- You will need to edit some files, having a good quality editor is a good practice.
-
Enabling launching VSCode from a terminal.
-
JDK 11 (optional): installed on your local machine.
- Used for SpringBoot content.
Log in to IBM Cloud
-
Use the
ibmcloudcommand to log in to the cloud account. Replace the user_id, password and team name with the sandbox ones:$ ibmcloud login -u <user_id> -p <password> -g <workshop-team> -r us-south -
Select the account number you have been assigned to:
$ ibmcloud login -u email@company.com -p XXX -g workshop-team-one -r us-south
API endpoint: https://cloud.ibm.com
Authenticating...
OK

Select an account:
1. GSI Labs - IBM
Enter a number> 1
Targeted account GSI Labs

Targeted resource group workshop-team-one

Targeted region us-south

API endpoint:      https://cloud.ibm.com
Region:            us-south
User:              email@company.com
Account:           GSI Labs
Resource group:    workshop-team-one
CF API endpoint:
Org:
Space:
Log in to OpenShift Cluster
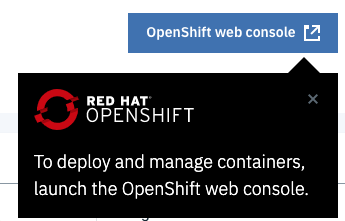
-
Access the OpenShift console by clicking on the button:
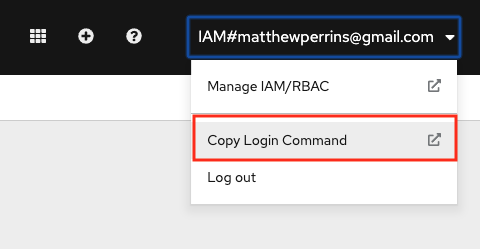
-
Get the OpenShift login command, which includes a token:
- Run the login command in the terminal:
$ oc login --token=<token> --server=https://c103-e.us-south.containers.cloud.ibm.com:<port>
Logged into "https://c103-e.us-south.containers.cloud.ibm.com:<port>" as "IAM#email@company" using the token provided.

You have access to 71 projects, the list has been suppressed. You can list all projects with 'oc projects'

Using project "dev-ab".
Note
Depending on your macOS security settings you may need to allow access to oc and kubectl, go to System Preferences=>Security & Privacy and press Allow Anyway.
Configure git
- Execute the following commands replacing the email and short name:
$ git config --global user.email "<email>"
$ git config --global user.name "<short_name>"
Optional: Use Gitpod for development
Gitpod is an open-source Kubernetes application for ready-to-code developer environments that spins up fresh, automated dev environments for each task, in the cloud, in seconds.
If you want to use Gitpod as the tool to write code for this journey, complete the following steps to get you started:
-
Head over to gitpod.io, login with your github account by clicking Continue with GitHub.
-
If you have been invite to a GitHub organization or want to use a specific one to complete this journey, Gitpod is going to need to have access to the repositories in that organization. Grant access to gitpod to your GitHub organization by going to account Settings on the top right corner, navigate to Integrations, select GitHub and click Manage on GitHub.
-
You should be redirected to GitHub, search the organization you are using for the journey and click grant to allow Gitpod to access repositories in that organization.
There you go! Back to gitpod.io, navigate to workspaces and click New Workspace to create workspaces as you go through the labs.